Monday, October 27, 2014

Baked BBQ Meat Buns ( Seremban Siew Pau )

03.10.2014 - Nongsa, Batam.  Seeing so many post of Siew Pau, So i also wanna try, see if i could handle the challenging part.  It seems complicated at first, but when i was making it, it wasn't really that hard.  Just need a little patience and time to do everything from scratch, i have to grilled the chicken char siew earlier for the fillings and time consuming is the dough double folding.

I used two recipes for this whole BBQ buns making,  For ingredients, i picked Kenneth Goh baked-barbecue-pork-buns-or-sio-bao i did some modification with the filling instead of pork, i used chicken meat and for the mixing dough and folding method, i used My Kitchen Snippet crispy-bbq-bunssiew-bao recipe.

I know my buns are not perfect, but i hope this is the nearest look to the real Seremban siew pau! :) what do you think??


BAKED BBQ MEAT BUNS / SEREMBAN SIEW PAO  
Skin Recipe adapted from: 酥皮叉烧包
Servings: Prepare about 15 Sio Baos ( i managed to make 14pcs only )


Water Skin
200 grams of Plain flour
60 grams of vegetable shortening/Lard/cooking oil/butter
30 grams of castor sugar
1/4 teaspoons of salt
100 ml or grams of water
Oil Skin
150 grams of plain flour
100 grams of vegetable shortening/Lard/cooking oil/butter

Fillings
300 grams of diced barbecue pork (叉烧)( chicken )
200 grams of green peas (青豆)
1 big onion – diced (大葱)
2 tablespoons of sesame oil (麻油)
3 tablespoons of castor sugar (细砂糖)
3 tablespoons of Chinese cooking wine (烹饪酒)( omit )
5 tablespoons of oyster sauce (耗油)( no measurement )
2 tablespoons of dark soya sauce (not in picture) (酱油)
About 5 tablespoons of corn starch/potato starch with 5 tablespoons of water (5勺生粉或玉米粉加5勺的水)( only 2 1/2tbsp corn starch )
Others
1 egg mixed with 1 tablespoon of golden syrup ( replace golden syrup with 1tbsp honey )
some sesame seeds


STEPS OF PREPARATION

Preparing Fillings:-
In the frying pan, add 4 tablespoons of cooking oil, sauté the onions until fragrant. Add in the barbecue pork and stir fry until well mixed which took about 1-2 minutes. Add in the green peas, cooking wine, oyster sauce, sesame oil, sugar, oyster sauce and dark soya sauce. Stir fry for another 2 minutes. Add in the starch solution and off the heat when the starch solution turns transparent. If it is not sticky enough, add in more starches.  It is best to take some filling and taste if it suits your taste buds. Note that you have to be rather high handed with your seasonings because the bun skin is rather plain in taste. Once ready, set aside for later assembly.


2 OPTION FOR YOU TO DO YOUR DOUGH

Preparing Water / Oil Dough : by Kenneth Goh
Put all the ingredients for the water skin and use a stand mixer to knead until smooth. Note that this is rather fast and may took 2-3 minutes. Kneading using a stand mixer is optional and it is rather easy to knead by hand. Take out the water skin, set aside and perform the same for the oil skin. If it is too sticky, add plain flour one tablespoon by tablespoon until a pliable dough is form. 1. Mix all the ingredients of oil dough together and knead till you get a soft dough. Set it aside to rest for 30 minutes.

Divide both the water skin and oil skin into 15 equal portions. Take one portion of water skin, flatten it, put a portion of oil skin on top. Seal the water skin. Lightly flatten it and set aside.  For the wrapping, take one portion of the combined skin (oil skin wrapped by water skin) and placed in a lightly floured surface. Use a rolling pin to roll it until about 2 mm thick and in the shape of a circle.

For egg wash, crack 1 egg and add 1 tablespoon of golden syrup, stir until well combined, brush on top of the buns sparingly. Send back to the oven again and bake for another 15-20 minutes until the desired colour tone.

Preparing Water/ Oil Dough: by My Kitchen Snippet ( i used My Kitchen Snippet method ) 
Mix all the ingredients of water dough together and knead till you get a soft dough with a machine hook. Set it aside to rest for 30 minutes. do the same for oil dough.

For My kitchen Snippet types which i follow:-

Divide both dough into 14 equal pieces. Wrap the oil dough into the water dough and flatten it (pix 1)
Roll the dough out into a longish flat piece (refer to pix 2 ). Roll it up like a swiss roll (pix 3)
Turn 90deg (pix 4), and roll out again and roll it up like a swiss roll (pix 5 & 6).
Press dough with palm and lightly roll out into a circle (pix 7)
Place filling in the center (do not put too much filling in), wrap and pleat into a pau shape (pix 8) Place on a greaseproof paper.
Brush pie with egg wash, sprinkle with some sesame seeds and bake at 375 degree F (190c) for 20-25 minutes or until golden brown.

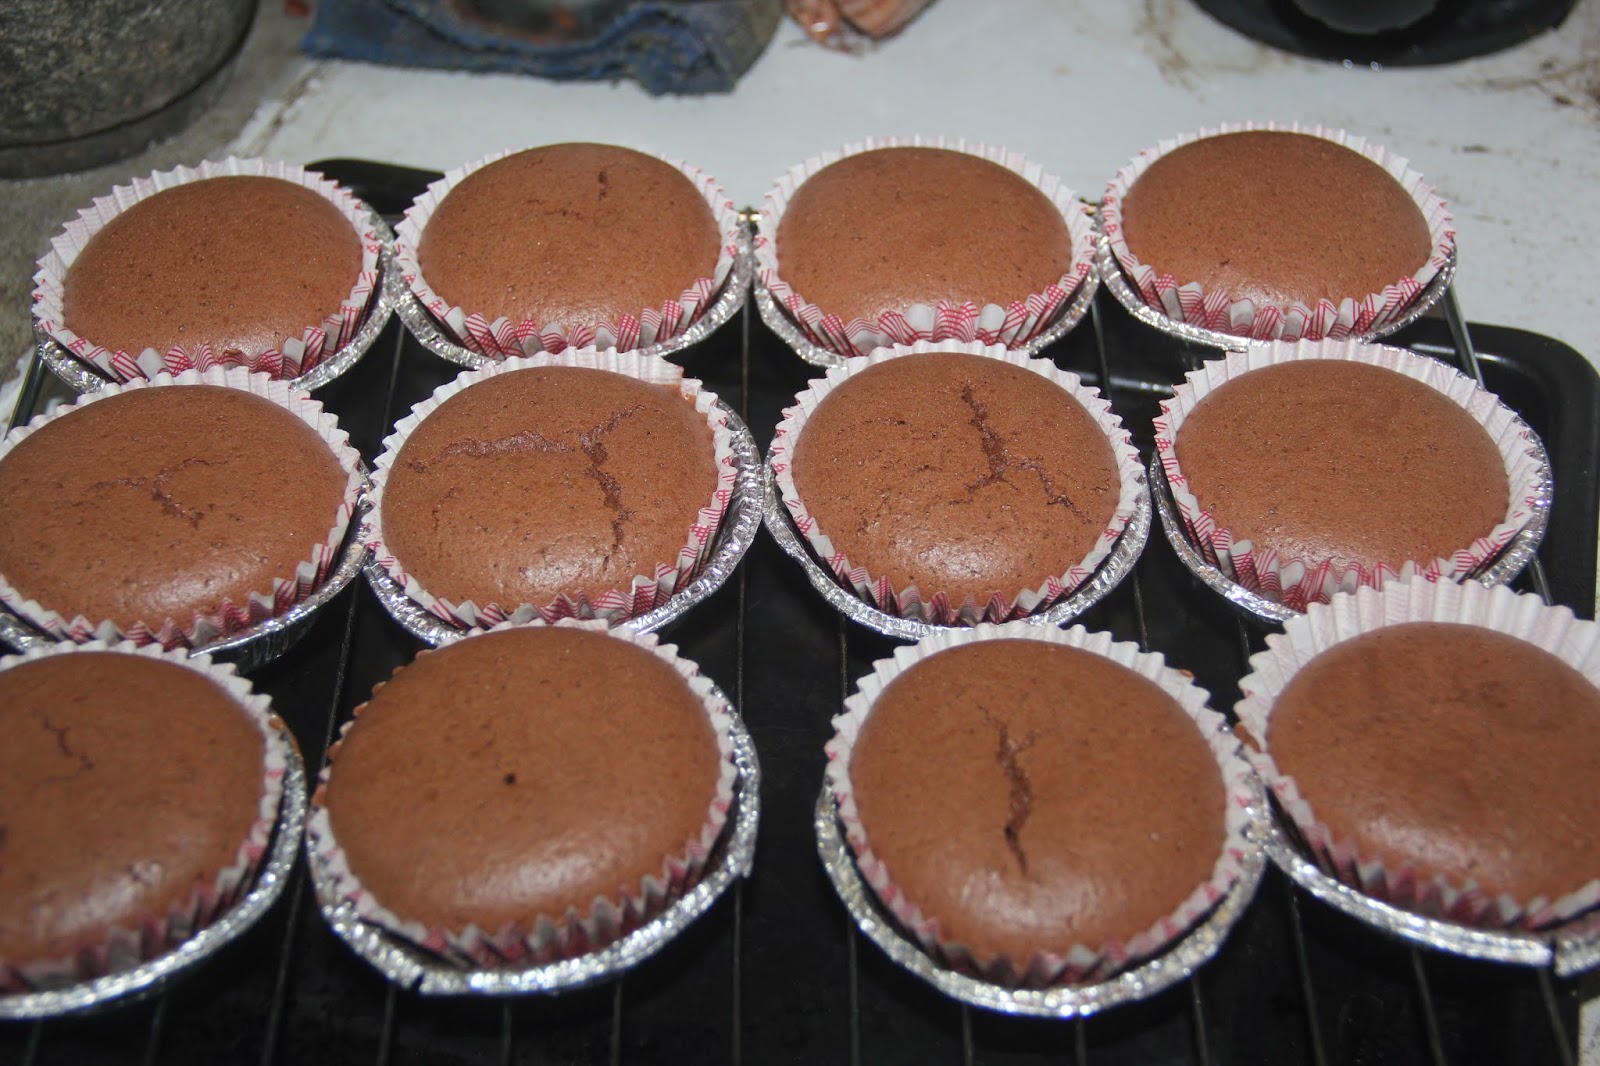
I bake at 190c, middle rack, brush egg wash and sprinkle sesame seeds on the buns and bake for 20mins and removed brush 2nd time egg wash and bake another 20mins or until golden brown.


Friday, October 3, 2014

Kueh Buah Melaka/ Onde-Onde / Klepon

29.09.2014 -  Nongsa, Batam.  Have so much fresh grated coconut left from Kosui making....so making onde onde i think is the best kueh to use up much of grated coconut.

It was my 2nd time making Onde-Onde/Klepon.  This time i try Nyonya Cooking Recipe Onde-Onde / Buah Melaka.  The reason i choose this recipe because of the amount / quantity is not too much.  Its about 13 pieces of onde-onde only for this recipe.  So just enough and not too much for 2 ( actually alot for 2 person...hahaha..., well what to do, i think this recipe is the best for the less )

The onde onde taste great like from the market, chewy texture and simply easy to prepare. Here's her recipe.


ONDEH ONDEH by Nyonya Cooking
( I make a total of 13pcs. )

Ingredients
60g glutinous flour
30g tapioca flour
25g sugar
60ml pandan leaf extract ( my pandan juice is not so green, so i added pandan paste )
50g desiccated coconut
1/2 tea spoon of salt
added 1/8tsp pandan paste

1 tablespoon of water
Filling: gula melaka or palm sugar


Steps to prepare
Pour the water and salt over the desiccated coconut. Mix it well and steam the mixture for 15-20 minutes.

Then, mix the glutinous rice flour, tapioca flour and sugar evenly before adding the pandan leaf extract to create a dough. If the dough is too soft, add more glutinous rice flour.
Divide the dough into 14 little balls.

In each dough, put the chunks of gula melaka or palm sugar in it. Be careful not to make a thin layer of dough which coats the filling as the skin will expand when boiling. Hence, this may result in a torn dough which allows the filling to flow out.

Put the filled dough into a pot of boiling water. Once it floats, you can dish it out but leave it for another 5-10 minutes if you want the filling to melt even more. This will create a fluid sugar filling as you bite into the Onde-onde.

Coat the Onde-onde with the steamed desiccated coconut.

Leave it to cool and enjoy!

 This is the dough after all mix up. Its very easy to handle, but not too hot in your kitchen.  
The dough can go very soft and sticky.

 After the filling, place each balls on the plate separately far from each other or else they will stick together


oppss..still got small chunk of gula melaka not melted.. :) hehehe....


Saturday, September 27, 2014

Kueh Kosui

27.09.2014 - Nongsa, Batam.  Kueh Kosui is one my all time favourite kueh since i was a kid.  Have never tried making it but i have intention to try since i bought some little cups for kosui.  At first, when i was searching recipes, i thought of making kosui without alkaline water, because i could't find it everywhere.  Surprisingly, just today, happened that i saw it at the meat section...(lol..) and the packaging was so small, just happened that i read the word and found out that it said  "kapar sirih/ alkaline water ) i was so excited and immediately went home to make kosui!

This recipe was adapted from Kenneth Goh recipe kosui-or-kuih-ko-swee   Glad to pick Kenneth recipe for my first attempt, the quantity just right for my small family of 3.  Its easy and so quick to prepare.

My kosui turned out to be so delicious, springy, soft and just perfect for my afternoon coffee.  What a great experience for the first time making with great success.  I will sure be making this again and again.


Ingredients:- 
prepare 20 small cups 
( I managed only 17 1/2 cups of kosui )

50 grams of rice flour (粘米粉)
50 grams of tapioca flour (木薯粉)
450 grams of lukewarm water (温水)
80 grams of gula melaka or gula apong (椰糖或其他棕榈糖)
20 grams of white sugar (白糖)
1 teaspoon of alkaline water or lye water or kansui(碱水)

Coconut Coating 
200 grams of freshly grated coconut (椰丝) ( I did not do a proper measurement, only use around 1/2 cup or a bowl i guess )
Pinches of salt   (盐巴)
2-3 pandan leaves cut into smaller pieces (香兰叶)


Method:-
Heat the gula melaka or gula apong, white sugar and water in a microwave for about 1 minutes (until the sugar dissolved). Add the rice flour, tapioca flour and alkaline water, stir until well mix. Return the solution back to the microwave, heat for another 1-2 minutes.

In the interval of 0.5 minute, take out the bowl and stir. As long as the solutions starts to thicken, you can take out from the microwave and transfer to the greased cups. Note that depending on individual microwave oven, it can be rather fast. Keep an eye and as long as it is thicken (but can still be poured, it is consider done).

If you do not have a microwave oven, perform the same procedures over the stove. Note that  you must use medium to low heat to heat the sugar and rice flour solution. Constant stirring is required until it thickens. ( pour water into a sauce pan, add in gula melaka and white sugar stir till melted off fire, remove from stove and add in alkaline water and rice and tapioca flour with a whisk, whisk till combine, place on the stove again with a low fire to thicken the batter, stirring constantly until thick and off fire ) 

Once the partially cooked rice solution is ready, transfer it to the greased cups. Steam in a steamer for about 10 –15 minutes under medium to high heat. It is consider as cooked when colour changes and a tooth pick inserted comes out clean. Leave it to cool completely and use a toothpick to unmould the steamed cake. ( grease all small cups, * i dip a little cooking oil to the kitchen tissue and wipe the small cups, place on the steamer pan, pour the thick batter into a jar, and pour batter to a small cup at the stove steamer.  I steamed my kueh for 25 mins until toothpick come out clean and let it cool to use a toothpick to unmould the steamed kueh and coat with grated steamed coconut and continue with the rest of the batter until finish )

For the grated coconut, steamed the grated coconut in a steamer,pinches of salt and the pandan leaves. Steam in the steamer for about 10-15 minutes or until the pandan leaves are soft.

 This is Kapur Sirih / Alkaline Water, found at the Meat section. 


Sunday, September 21, 2014

Tahu Telur Singapore Style II

You can see earlier i have posted a recipe of  Tahu Telur Singapore Style which ran out of shape because without a moulding! For this recipe, we have got the moulding which specially made for this recipe.  We couldn't find the tahu telur moulding till now, but lucky we have a great idea and get someone to do the cutting for us..lol.

And of cause, with our dear friend Mr.Ridwan guide us step by step of cooking tahu telur, my husband managed to make a proper tahu telur...how wonderful!! ( we simply missing Pondok Sari Wangi Brunei delicious food )


Greentea Chiffon Cake

20.09.2014 - Nongsa, Batam.. Just after 2 days a Pandan Chiffon Cake and my hand is itchy to make another chiffon cake.  I guess success doesn't mean good.  the more i achieved the more i make, and the more i make, the more i eat!!  Ok, i will take it slow after this one...

This time im making a Greentea Chiffon Cake, was so interested to make this greentea flavour a long time ago! This recipe was adapted from christine's recipe - Greentea Chiffon Cake.  It was real good. i can say.  The texture was extremely airy, spongy so spongy....and soft as cotton.  That kind of cottony is definitely different from Pandan Chiffon Cake i made earlier.

This recipe definitely i can use for other flavours in the future! yeah... guess i will stick to this one basic chiffon ingredients..and i love it because it is not overly sweet, just perfect.


With small 22cm tube pan, i managed to make extra 3 cupcakes with the batter.


Ingredients
Batter:

80 gm cake flour
5 egg yolks
30 gm caster sugar
35 gm vegetable oil
1/2 tsp baking powder
1/8 tsp salt ( omit )
3 Tbsp green tea powder (Matcha powder), or to taste
120 ml hot water (or hot milk) ( i used water )

Egg whites:
6 egg whites
50 gm caster sugar
1/2 tsp cream of tartar

Method:
Preheat oven to 170C (338F).

Dissolve green tea powder in hot water (or hot milk). Let cool down.  Combine cake flour, baking powder and salt well. ( i combine all flour form, sieve flour, greentea powder and baking powder set aside and sieve one more time before mix to the egg yolks batter )

Mix green tea powder in hot water/hot milk well.

Whisk egg yolks, stir in 30 grams of caster sugar until completely dissolved. Add vegetable oil, green tea mixture, and sift in cake flour mixture in sequence. Make sure to combine and stir well between adding each ingredient. That’s the batter you need. Set aside.

Use an electric mixer to beat egg whites until bubbles form. Add cream of tartar. Blend thoroughly, then add one third of sugar at a time. Combine well between the adds, until stiff peaks form. (Please refer to this video, showing how to beat egg whites, on my youtube channel.) Here’s a simple test whether your egg whites are ready or not. The egg whites won’t slip or fall down even if you turn your bowl upside down.

Fold in 1/3 of egg whites into the batter. Gently incorporate all ingredients with a rubber spatula. Repeat this procedure with the rest of the egg whites. Don’t beat or stir too hard, just combine well.
Transfer mixture to cake mould. Bake in preheated oven for 35 to 40 minutes. Test the cake with a needle. If it comes out clean, it’s cooked. Remove from oven and invert the mould immediately. Let the cake cool completely. Use a knife to run around the edges of mould and take out the cake carefully. ( preheat at 190c, bake at 180c 50mins + 3 cupcakes at lower rack oven.  I invert cake upside down successfully this time.  Cake was so soft, airy and fluffy )

Add caster sugar in fresh whipping cream and beat with an electric mixer until soft peaks form. You might like to sit the bowl on some ice cubes to beat whipping cream in warm weather. I skipped this step when the weather is cold. Most importantly, chill the mixer and bowl in fridge before beating, that would help you to get better results. Chill the beaten cream in fridge for 30 minutes.
Cut the cake into halves and spread cream evenly as picture shown. Done.


Pandan Chiffon Cake & Cupcakes

18.09.2014 - Nongsa, Batam   I thought i wont be baking any chiffon cake for a longtime, but here i am doing it again, feels like ages didn't bake a good pandan chiffon cake and im like dying for one and searching for good pandan chiffon recipe to try out.

Searching high and low for a simple recipe and finally i was attracted to this Pandan Chiffon Cake  from Aunty Yochana's Cake Delight blog.  She has so many wonderful recipes on her blog, please do feel free to check her out!!

I have no regrets to pick her Pandan Chiffon Cake recipe because it turn out so perfectly good!! im so lucky to get the right recipe to bake for precious time of preparation and ingredients used...however, i did some adjustment on the sugar amount used, i only used 130g of sugar in total instead of 180g.  im so glad i did the reduction of the sugar amount, with 130g sugar, the cake has a perfect sweetness, not overly sweet.  It could be too sweet for me if i use 180g.

Anyway, back to the result, my cake was turn out so perfectly good, the height was perfect and texture was soft, spongy, airy but the only thing is that i can't invert my cake after bake.  As im trying to invert it upside down, the cake was eventually dropped out from the pan...lol..so i quickly safe the cake from the table and move it to the wire rack.  lucky the cake still stay light and height wasn't affected with the cooling method i used like normal cake.  By the way, i have this not a regular chiffon pan but has a tall and deep, but mine is very short and i managed to get another 4 cupcakes size chiffon.


Ingredients 
for egg yolk mixture:

6 egg yolks
2 Tbsp. Pandan juice
150 gm/ml coconut milk
1/4 tsp. salt ( omit )
4 tbsp. Corn oil
1 tsp. Pandan Paste
1/4 tsp. Green colouring ( omit )
80 gm. caster sugar ( total sugar used in this recipe only 130g for both whites n yolk, if u like sweeter, you may stick to the original recipe that calls for 180g in total )
140 gm. Cake flour
added 1tsp baking powder

Egg White Mixture:
6 egg white
1/4 tsp. Cream of Tartar
100 gm. caster sugar ( i separate half sugar from a total of 130g for whites )

Method:
(1) Mix all the egg yolk ingredients together and stir till smooth.  ( i beat egg white first keep in the fridge, beat egg yolks & sugar till ribbon stage, add in oil with a whisk and follow by coconut milk with a whisk and pandan juice, green pandan paste whisk for a second till combined and add in flour 3 batches with a whisk till combined. )

(2) Whisk egg white with cream of tartar and gradually pour in the sugar. Whisk at high speed until frothy and stiff peak forms.

(3) Gently fold egg yolk mixture with egg white mixture until blended. ( fold in egg white with a whisk 1st and 2nd batch and last with a spatula to mix well )

(4) Pour into a 9" (23 cm) tube pan. Bake at 170C for about 40 to 45 min.s or until cooked.  I used 22cm tube pan, Preheat at 190c and bake at 180c for 55mins +  extra 4 cupcakes, bake at lower rack.  Another 12 mins before finish, i lower down temperature to 170c b cos the cake rise high with just 2 very small cracks.  ( adjust your own oven to the right temperature ). 

(5) Remove from oven, invert cake onto cooling rack until completely cooled before removing from the pan.  No need to invert upside down, the cake would drop, so just cool it on the rack.  the cake is very delicious soft and not too much shrinkage.  perfect and sorry to say it is better than Kitchen tigeress recipe. i will use this for future pandan cake or cupcake. 

(6) Slice and serve.


Chocolate Cupcakes with Swiss Meringue Buttercream

11.09.2014 - Nongsa, Batam.. Have left over swiss meringue buttercream, thought of using it up for some cupcakes, so here i am making cupcakes but can't find to trust any good and spongy chocolate cupcakes and so i ended up using my chocolate cake recipe for this cupcakes and the amount of batter just right for 12 cupcakes, bake for 45mins with only 3 cracks cupcakes.....Perfect!! :P

It was incredibly successful, the cake turn out just perfect!! So spongy, light and soft.  Just the right texture for a good cupcake, not too airy and not too dense...  gosh!! Im so happy and in love with this recipe.


Quick & Easy Bibimbap in a Bowl ( Korean Mix Rice )

This for sure is everyone's favourite dish! Bibimbap simply has everything you need in one bowl, eating 'em is easy too by mixing ...