Thursday, October 31, 2013

Oriental Fried Rice with Acar Pickled Condiment Recipe

29.10.2013 - Batam.  Make an express Acar pickled for my fried rice for lunch.  

Acar pickled is very easy to make and eat after 30 mins marinated with all the seasoning is what i like to eat.  Eat a not overnight or longer than 3 hours marinate acar is that crunchiness and freshness together with that sour and sweet taste that excite me.  Acar pickled can go along with any dishes like kurma/briyani rice & chicken etc.  I can say its a perfect match with all dishes..  Acar can keep over night. 

Above Acar i used 1 big carrot peel and cut into small size, 1 big cucumber discard seeds and slice.  In a bowl, let all vegy soak in hot water for 5 minutes and discard hot water remain a about a cup.  Add in 1/3 cup vinegar ( to taste ) and granulated sugar ( to taste ) and mix well.  set aside for 30minutes and it is ready to eat.  Acar is best to keep overnigh.  


Fried Rice Condiments:-
Fried Rice condiments ( up to your liking ) cut cabbage, lettuce, slice cucumber, slice tomato, chicken or beef satay, prawn crackers or acar and top with fried egg.

Oriental Fried Rice Ingredients:-
1 egg
1 bowl cooked white rice
2 clove of garlic
1/3 cup frozen peas/ mixed vegetables
2 thumbsize fish cake or you can used any kind o seafood ( prawns / squids / chicken )
Spring onion for garnishing
salt, pepper, light soya sauce & chicken granules to taste

Method:-
In a wok, add 2 tbsp cooking oil ( medium fire ) in garlic sautee and add in mixed vegetables/peas, mixed well season with salt and pepper.

(big fire ) Add in seafood and stir well till aromatic and add in an egg and transfer a bowl of white rice to wok, add in seasoning, salt, light soya sauce, chicken granules and pepper and mixed well. ( with medium fire, so as the rice won't stick too quickly on your wok while you're mixing the rice ) and taste.

toss rice and mixed well, sprinkle chop spring onion and dish up. Place all condiments around fried rice and top with fried egg, served hot.


Auntie Anne's Pretzel Perfect @ Berjaya Time Square Shopping Mall

12.02.2013 - KL.  Berjaya Times Square Shopping Mall.  We come across Auntie's Anne, Im so dying for this since haven't had this for long time. So good!! :) but we encounter a very upset and bad experience from the super rude staff. You can see her face below!! Im so sick of it when this brings me back to that bad memory.  I feels like slapping her face now!!

Auntie Anne's

Snack PlaceAmerican Restaurant, and Dessert Shop
Berjaya Times Square (K-01-03B)Kuala LumpurWP Kuala Lumpur 55100


 So yum, lucky i come for you pretzel or else i will walk away and never look back! lol


look at this staff super sour face!! like her boss didn't pay her salary and you owe her a million dollar!! when i took this picture, she shouted at me and said " Hey! No Picture!! " very loud and furious!! as if i wanted to take her picture stick on my wall and lick her face!!!! Maybe she thinks i will snap this and steal the way she knead her fucking dough and i go home and make pretzel  selling next door to her kiosk!!  I just didnt get it, why she has to be this rude!! one snap of this pic and her expressions of anger for customer is consider verbally abusive. Maybe She has a poo brain!! 

2nd thought i was so piss off with the way she shouted at me "HEY!!" so rude!! who she think she is?? who she thinks i am, a homeless person standing in front??!!!! she shouted at me in front of so many customers. I was shocked and speechless! for the first time, i encounter this kind of rude woman and shouting to me as a customer! how rude can you get!?...is crazy!  I was so angry that she can't even speak to me as a customer in a polite way!!  She is super rude!! and showing her long and sour face all the way as if you owe her money!! she got serious problem!! 

 lucky i come here for food or least i will just walked away.  She will always be remembered and i will not go to this Auntie Anne's kiosk as long as she is there, i will go others, to avoid such rude and abusive people like her is not worth for me to pay a single penny to this kiosk for their business and services. People please regconize her face!! or she will ruin your good happy mood!!  she needs to go back to school to learn some courtesy and moral.   I hope she got karma one day!! a brave customer will shouted off her fucking face!! ( can you feel how angry i am now while writing this...) : (  


Lunch at Taste of Asian Foodcourt @ Berjaya Times Square Shopping Mall

18.02.2013 - KL @ Berjaya Time Square, Taste of Asia Foodcourt, offer a variety of food from economy rice selection to malay, chinese, korean, japanese, chinese and western cuisine. 

what you need to do is to buy a card to purchase your food at the stall as easy as that. and if you're a day visitor like us, you can get your balance refund by returning the card to the cashier.  The food court is super huge and it was quite empty when we were there for lunch.  Lunch at Stall 12 KV North Indian Food and Barbeque Rice Stall.  

Food court (Berjaya Times Square)

Food Court
Level 10 Berjaya Times Square (Jalan imbi 1)Kuala LumpurWP Kuala Lumpur55100

 This is the cashier counter located right at the entrance, where you should buy yourself a food credit card first before you going around the food stall to get your food.  


Monday, October 28, 2013

Peach Almond Tart

21.10.2011 - Brunei.  That was the date i made this Peach Almond Tart.  I remember i haven't post this recipe on my blog and here it is.  It is easy and delicious.  I adapted this recipe from my cook book " Food Lover".  I used A Ingredients for my tart crust which not from this recipe.  B Ingredients pastry is the original crust recipe of this tart. Is up to your choice.  They are almost the same.

I add some almond flakes & cinnamons before bake.  and it was delicious and lovely and i served with Vanilla Ice Cream.

Happy Baking!!


A Ingredients For Pastry:- ( shortcrust pastry i used for this recipe )
2 cups all purpose flour
12tbsp/ 170g cold unsalted butter ( cut butter into small pieces )
1/2tsp salt
2tbsp icing sugar
1/2cup ice water

B Ingredients For Pastry:- ( This is the original tart crust for this recipe )
2 cups/ 200g all purpose flour
3 1/2 oz / 7tbsp / 100g cold butter ( cut butter into small pieces )
Pinch of salt
1-2 tbsp cold water

Ingredients For Filling:-
3 eggs
3/4 cup / 150g sugar
2/3 cup / 150g spoonable heavy cream ( double cream )
2tbsp lemon juice
1tsp lemon zest
2 1/2 oz / 5tbsp / 75g butter
1 1/2 cups / 150g ground almonds
3-4 peaches, depending on size ( can peach )
Finishing with sprinkle of Almond flakes & cinnamon powder

METHOD

* Pulse in a food processor the flour, butter, and salt just until the mixture resembles a coarse meal with some small (pea-size) butter lumps.  Slowly drizzle in the ice-water, one tbsp at a time. Squeeze a small handful of the dough, if it doesn’t hold together; add more ice water. Do not overwork the dough, or the crust will be tough.  Turn the dough out onto a work surface. Gather the all dough together and wrap it up with plastic wrap and let it rest in the fridge for 1 hour. OR

* If you do not own a food processor, use pastry cutter to make a crumbling mixture or with hand to mix flour, butter, salt & sugar.  Add water to make a dough.  Form into a ball, wrap in plastic wrap and put into refrigerator for about 1 hour.  ( the process is exactly the same as above )

* Pre-heat oven 350f / 180c/Gas Mark 4.  Bake for 45mins.

* Roll out pastry on a floured work surface. Used 9-10" / 24-26cm tart tin/pan.

* Cut off the excess by rolling over the top of the pan with your rolling pin.  Line with a sheet of baking parchment and weight down with dried beans/ rice.  Blind Baking for 20mins.  Remove the baking parchment and dried beans/rice.  Keep the crust aside.

*   In a bowl, put in eggs & sugar and whisk until thick.  Stir in cream, lemon juice and lemon zest and add in butter in a small pieces.  Stand the bowl over a sauce pan double boil of simmering water and beat/whisk till the mixture become thicken and creamy.  stir in ground almond

* For fresh Peaches : Drop the peaches into boiling water for a few seconds, then skin, halve, remove the pits (stones) and slice into wedges.  I used canned Peach.  Discard syrup and cut peaches into wedges.

* Spread almond filling smoothly into the warm crust / pastry shell and arrange the peach slices on top.  Sprinkle with cinnamon powder and Almond Flakes.

* Baked in the oven for about 45 mins or until the filling is set.   It should be lightly browned but cover with foil if it brown too quickly.

* Leave to cool before serving.  Serve with vanilla ice cream.


Sunday, October 27, 2013

Steamed Kueh Lapis 九层糕

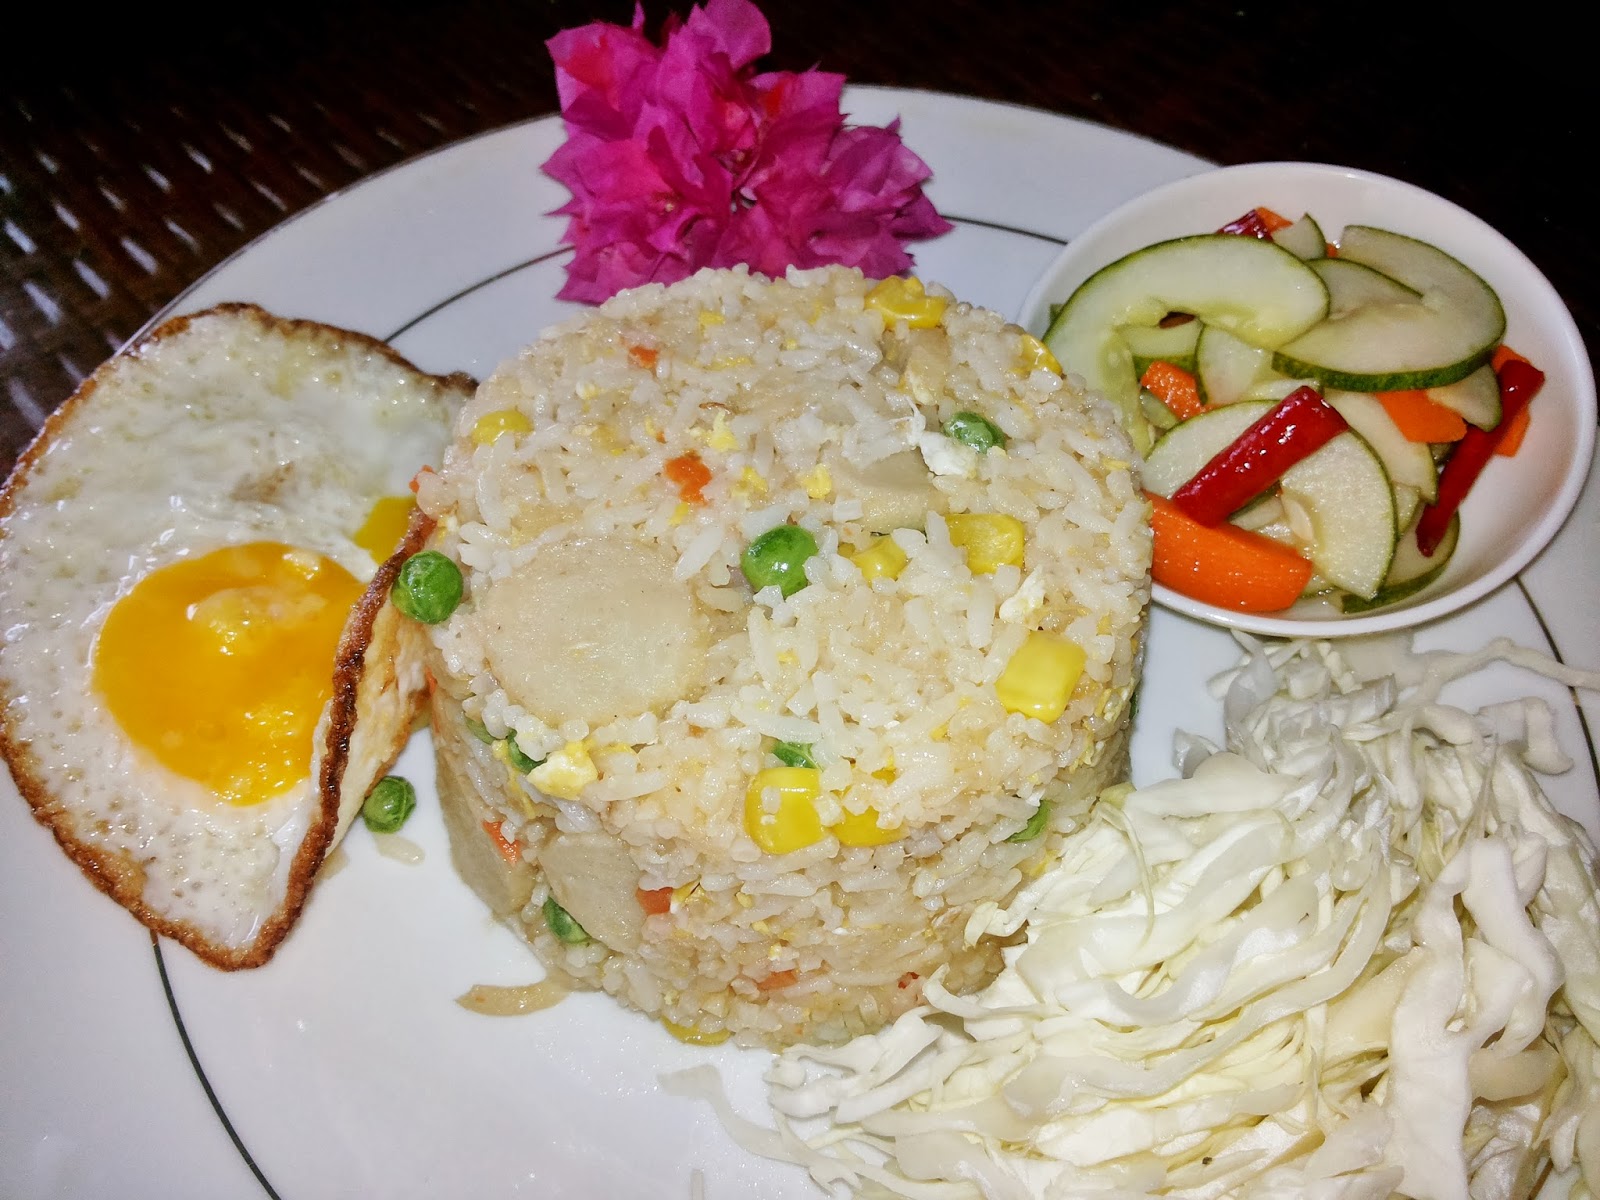
27.10.2013 - Batam.  Steamed Kueh Lapis is one of my favourite kueh since my childhood.  I know it wasn't easy to make as it seems to be.  I wanted to make this kueh so badly a very longtime but i am so not ready.  Since i have seen this Kueh Lapis video from Kitchen Tigress, she makes every thing seems so easy to do.

Today i have everything ready, so thought of trying out her recipe.  and one thing that i also found her experiment reading her blog about making this kueh several times which she experiment with it. it was quite interesting.

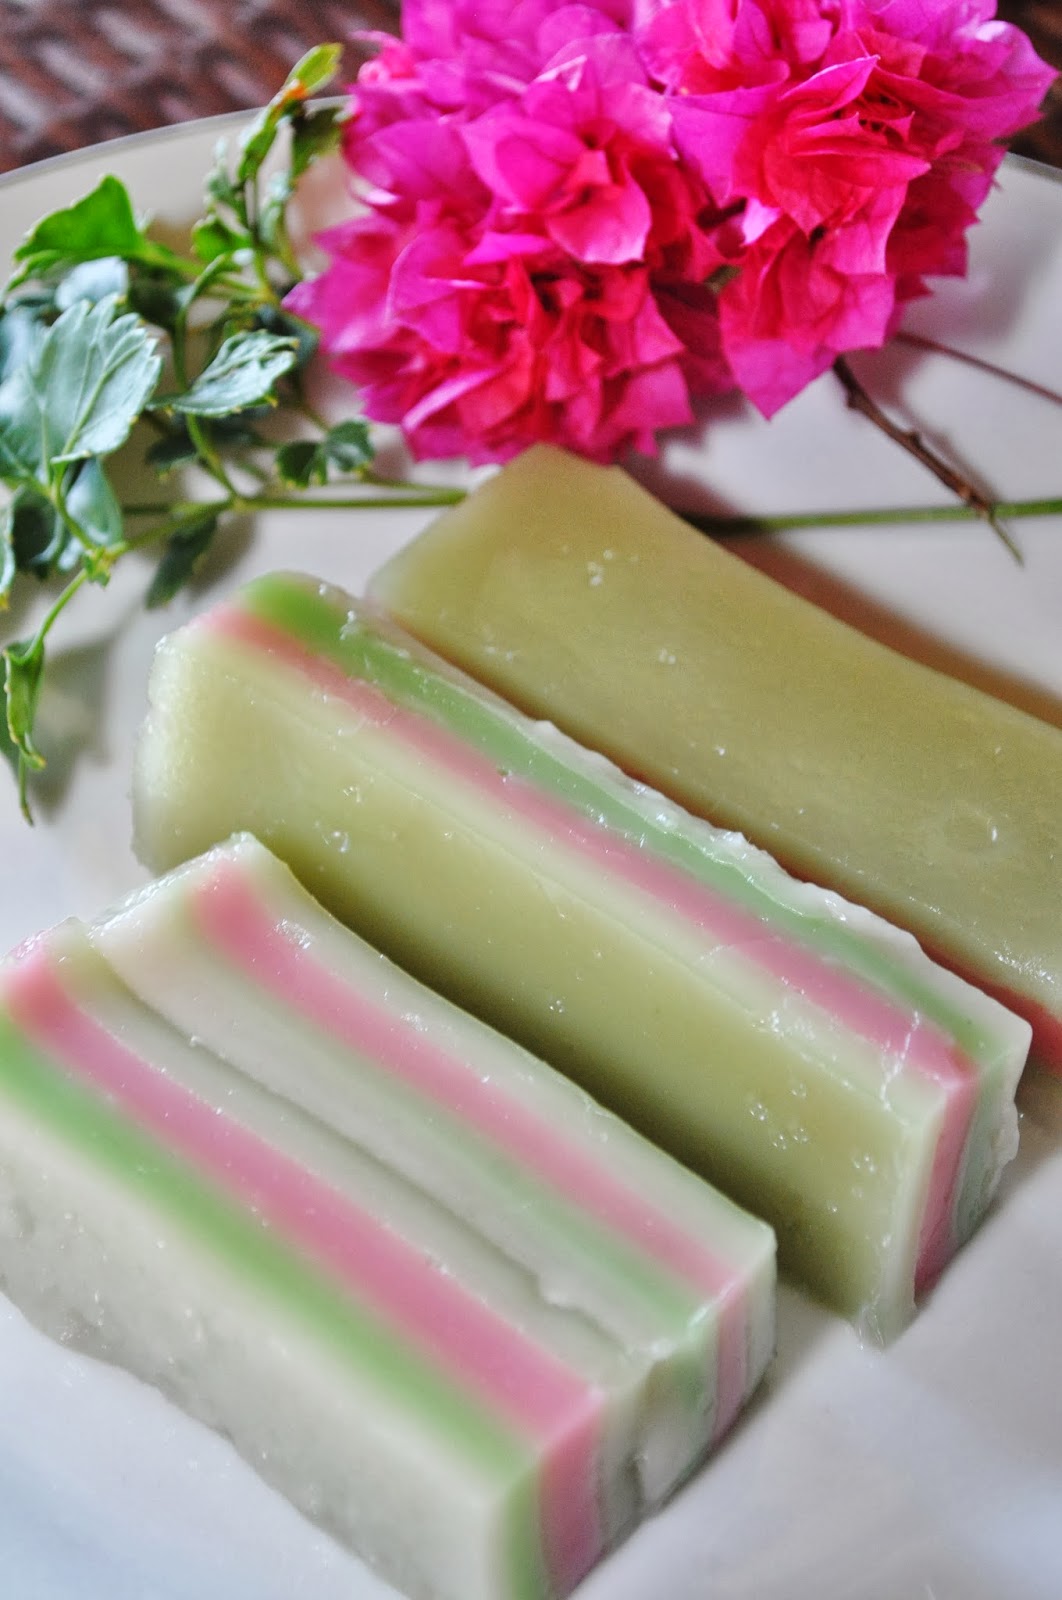
Since she has did her homework, hardwork and experiment, from there i knew where I should put more attention to when making this kueh.   It is the coloring, tapioca flour quality, steamed timing and no peeking when steaming, the kueh elasticity and the chewy texture consistency.  Finally my first ever kueh was done! It was so good.

Considering this is my first attempt and i thought it was good and successful. But however, it does look a little ugly thick and thin layers.  Well, i don't really mind that, as long as is tasted good, the texture is perfect, chewy and elastic, for me it is perfect.  If you use this recipe for your kueh lapis, just do your 7 or 9 layers nicely. :P

However, my kueh lapis didn't come out as much as 9 layers as in this recipe because i used a 22cm round tin instead of a 15cm square tin from her recipe.  The only round tin i have that could fit in to my pan steamer and as well as for certain layers I could have gone too much amount on each layers, so that could be the reason that i have least layers form.  

Anyway, i have no problem in my layers steaming, all steamed perfectly in 5 minutes each and never add boiling water until the end.   All stick to each layers very well perfectly and i could peel off each layer when i eat.   Overall i was so satisfied with the taste and the whole kueh.  This recipe is good to keep.

Happy cooking!!

I know it does look ugly! lol.....but its a successful texture result, elastic and chewy! I love it.


KUEH LAPIS (九层糕, NINE-LAYER CAKE)
Adapted from Kitchen Tigress, Recipe from Cooking for the President
(Recipe for 10 pieces)

4 pandan leaves, wash and cut 10 cm long
185 g sugar
⅓ tsp salt
400 ml freshly squeezed coconut milk, undiluted ( i used a box 200ml coconut cream 200ml, added water to 400ml )
200 g tapioca starch
50 fresh bunga telang (blue pea flowers) ( I omit this ingredient which i do not have.  i used red and green coloring )
rinse gently and remove ants if any; drain, then blot gently with paper towels
1 piece parchment paper, 15 x 15 cm

Pound flowers finely. Strain to yield 2-3 tsp juice. Set aside. Discard pulp. ( if you use this flower for coloring )

In a small pot, make pandan water by gently simmering pandan leaves for 5 minutes, covered, in just enough water to cover. Discard leaves. Measure 160 ml from the pandan water and discard excess, or top up with water as necessary if you're short. Put pandan water back in the pot, along with sugar and salt. Stir till salt and sugar dissolve, over low heat if you like. Add coconut milk and stir till even. Add tapioca starch and mix thoroughly. Strain into a mixing bowl. Push undissolved starch through strainer.

Measure 270 ml from the batter. Add flower juice. Stir till colour is even. ( i separate into 3 colors, red, green and original.  I used a toothpick to dip little color straight from the coloring bottle and with a toothpick i dip and mix into the batter.  My Green color is actually pandan paste )

Bring kettle to the boil and set aside.

Rinse 15-cm square cake tin ( i used a 22cm round tin ) to make it wet. Line bottom with parchment paper. Bring steamer to a rolling boil. Pour enough white batter into cake tin to form a layer 3 mm thick, about 100 ml. Place tin in steamer. Steam 5 minutes over rapidly boiling water. Steam another layer of white, then blue and continue with the rest of the color.

Repeat the white-white-blue sequence twice ( or your own color ), making 9 layers in total. Other than the first one, each layer needs about 90 ml batter. Stir batter to mix starch evenly before measuring each round of batter.

Have measured batter ready before lifting lid on steamer. Once lid is removed, quickly pour batter into cake tin and cover steamer. Every layer is steamed 5 minutes except the topmost, which gets 10 minutes.

Make sure steamer doesn't boil dry. To top up steamer: 1) wait till previous layer of batter is cooked; 2) reboil water in kettle; 3) add boiling water to steamer as necessary; 4) bring steamer back to a rolling boil, covered. After step 4, proceed to steam more layers as described above. ( my steaming process no added boiling water till end )

When all 9 layers are done, remove kueh lapis to a wire rack to cool down completely and set, about 3 hours.

To unmould kueh, loosen edges with a knife. Cover top of kueh with parchment paper to keep it clean, then turn cake tin upside down and knock firmly against chopping board till kueh falls out. Discard top piece of parchment paper. Cut kueh by pressing knife downward, i.e. do not saw. Discard bottom piece of parchment paper.

Serve kueh lapis as a dessert, snack, or for tea. Leftovers should be refrigerated. Steam on a perforated tray till just heated through, then cool to room temperature before eating.


 Chewy texture!

look at that, it stretches so well!!


Saturday, October 26, 2013

Coffee Chiffon Cake

26.10.2013 - Batam.  I bought 5 new aluminium pans including a W: 22cm & H: 2.5" chiffon pan.  I am so ready to test baking a chiffon cake.

So today i decided to make a simple chiffon cake. All i have is coffee.  So a small Coffee Chiffon Cake recipe to test my very first chiffon cake baking.   Reading so many failed attempt from people, but i am not afraid to try though.   So i have got this recipe from Small Small Baker.

My chiffon cake turn out great, texture is soft and light.  but its not a high chiffon cake and not as high as it rose like Small Small Baker chiffon cake.  it is probably my pan is wide not high.  My pan only 2.5" high and it is better to use a 6" pan sure looks better.

I whisk the egg white first instead of the egg yolks, for me is about the same because i work quick with the egg yolks mixing.  and i don't have the risk to failed on my egg white whisking with grease and all that stuff later on.

I missed look of the amount of sugar.  Instead of a total of 70g, i used only 20g..LOL...i was wondering since the beginning why this recipe only used so little sugar and so afraid the cake might turn out bitter when i only saw the recipe used 20g for yolks, is my fault, didn't read the recipe properly.  Lucky the whole cake turn out well without the bitterness of the coffee.

Very soft and tender

Ingredients (6-inch chiffon tin) ( i used my chiffon pan size as mentioned above )

2 egg yolks
20g caster sugar
1 tbsp instant coffee powder
20ml milk
20ml cooking oil
40g self-raising flour

2 egg whites
1/4 tsp cream of tartar
50g caster sugar

Method
1. Whisk egg yolks and sugar. Stir instant coffee powder with milk until the coffee powder dissolves.
2. Add the coffee mixture and oil into the egg yolk batter. Fold in the flour.
3. Beat egg whites and cream of tartar until mixture is foamy. Gradually add in sugar and beat until stiff peak form. (Important!)
4. Gently fold beaten egg white into egg yolk batter (in step 2) until blended in 3 batches.
5. Pour batter into ungreased (recommended 6-inch chiffon tin) i used H: 2.5" pan & W:22cm . Bake in pre-heated oven at 180 deg C for 30 mins.
6. Remove from oven and invert cake immediately until it is completely cool. ( cake rise beautifully but its too small in size )


Wednesday, October 23, 2013

Chocolate Cake Recipe

21.10.2013 - Batam.  I love chocolate cake.  2 days ago i made a chocolate cake from a steamed chocolate cake recipe.  I absolutely love it but however, i still wanna eat a real good chocolate cake. 

This is the chocolate cake i first made on the 22.01.2010, i gather several recipes into this one recipe below

I still remember how delicious, soft and moist this cake was. I decorated with chocolate buttercream frosting and pistachio nuts


So i remember i have ever made one in 2010, it was a recipe i adopted from woman's weekly but i do alot of adjustment from one recipe to another and came out my own recipe, i like to do ingredients comparison and amount and so i put it into one recipe and do my baking.  It is hard work. But worth all my time reading, comparing and gathering so many chocolate recipes into one good recipe.  This recipe created not like other chocolate cake which put every ingredients in one bowl mixed and baked that easy.  This recipe need some extra work which is separate egg yolks and white. beat separately.  I used this method so as i want my cake to rise beautifully full but remain dense and moist not dry like sponge cake, and it work, rise beautifully! lol... 

It turn out good anyway and i still kept the recipe with me.  and here again i bake for the 2nd time.  It is really so delicious.  

The should look as good as my first chocolate cake pic above, dark and chocolaty but the camera snap turn out my cake not much the same, probably the lighting/ flash.  anyway, i love this cake.  My house smells so chocolate when the cake almost cooked.  I am happy to share this recipe before i lost it. :) 

Happy Baking!  


Ingredients:-
100g dark chocolate chopped, melted
185g butter, melted
2 1/4 cups cake flour (sieve ) / Self-Raising Flour
1/2 x 2 tsp baking powder ( sieve ) = 1/8 tsp
1/3 cup coco powder ( sieve ) 1/3 cup = 4tsp
1/2 cup warm water
1/2 cup fresh milk , room temperature
1 1/3 cup brown sugar ( if use granulated sugar reduce amout of sugar to 1 1/4 cup )
4 eggs, separate, room temperature

METHOD:-
1) Sieve flour, coco powder & baking powder put aside, Melt chocolate put aside
2) Melt butter put aside
3) Beat egg white until ribbon stage until stiff and put aside,
4) Separate egg yolks & white, Beat egg yolks with half sugar till fluffy
5) fold in flour into beated egg yolks, mix a little, fold in melted chocolate, butter, warm water and milk.  Fold in egg white mix well.
6) bake 180c-200c, 60mins. ( after 25 mins cover with aluminium foil to avoid burn ) i put cake bake in center of oven.


Tuesday, October 22, 2013

Furama Bukit Bintang, KL

18.02.2013 - Kuala Lumpur.  Elegant and modern, Furama Bukit Bintang is centrally located in Kuala Lumpur's Golden Triangle area, a 3-minute walk from Berjaya Times Square. Offering an outdoor pool, it also has a fitness centre and free parking.

Featuring over-sized windows and dark wood fittings, non-smoking guest rooms are fitted with air conditioning and a 32-inch flat-screen TV. Other comforts include a tea/coffee maker, safe and hairdryer.

Furama Bukit Bintang, Kuala Lumpur is a 5-minute walk from Imbi Monorail Station and a 15-minute walk from Pavilion Shopping Centre. It is a 45-minute drive from Kuala Lumpur International Airport.

Guests can enjoy views of the city while relaxing at the outdoor hot tub. Laundry services, housekeeping or midnight snack are available with 24-hour room service.

Spices @ Furama serves an Asian-inspired international buffet in a stylish setting. Jazz music and wine can be enjoyed at Cinnamon Lounge, while Poolside Bar offers refreshing cocktails and coffee.

Hotel Rooms: 433, Hotel Chain: Furama Hotels International Management.


Furama Bukit Bintang

Hotel
136 Jalan Changkat Thambi DollahKuala LumpurWP Kuala Lumpur 55100


  • Phone:+60 3-2788 8888
  •   I Love my shot!


      View from our room, 23rd Floor


     ZOOOOOOOM.........................


    View from 23rd Floor


    Family Deluxe Room


     Welcome Fruit Basket


    Show time!

    Quick & Easy Bibimbap in a Bowl ( Korean Mix Rice )

    This for sure is everyone's favourite dish! Bibimbap simply has everything you need in one bowl, eating 'em is easy too by mixing ...